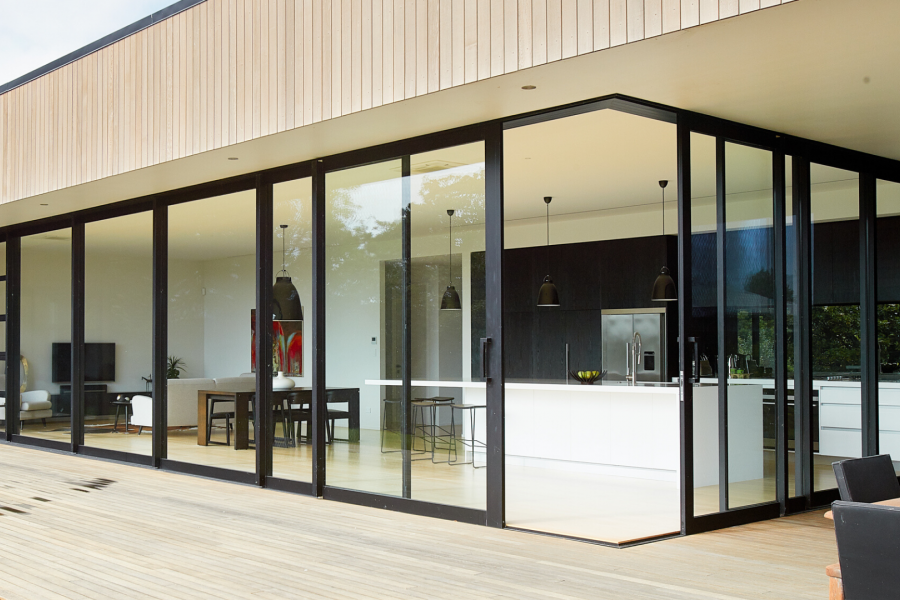
 VANTAGE Windows & Doors
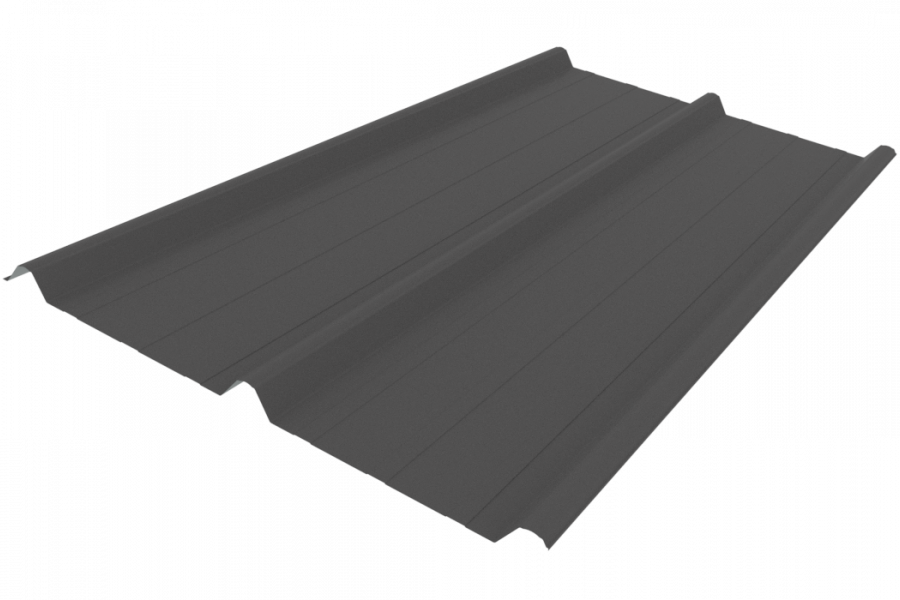
 Roofing Industries
 dormakaba
 XLam Cross Laminated Timber Panels
 SPAX
SPAX


 Bates Surfaces
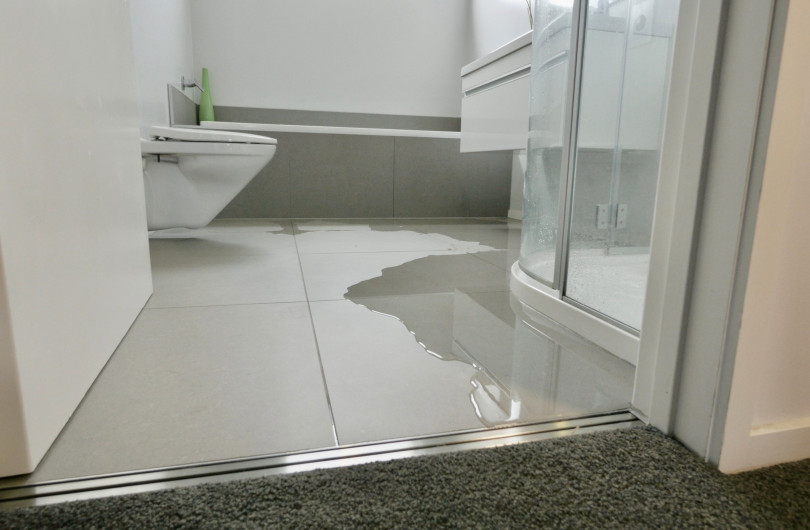
 JESANI
 Aero
Aero


The Waterproofing Membrane Association Inc. (WMAI) develop a range of Codes of Practice (COP) for Water Proofing Membrane(s) (WPM) for all situations.
MBIE have cited the Internal Wet Area Membranes Code of Practice (IWAM) (chapters 1-4) as E3/AS2.
If you are designing/specifying or are involved in a project as a BCA or project manager, and it has wet area environments included in the scope, the use of E3/AS2 (For Internal Waterproof Membrane Systems) as the accepted pathway provides updated, innovative and complete/concise information and the supporting details to produce wet areas that will meet the requirements set out in E3 Internal Moisture.
Previous to this new information being available and cited, we only had E3/AS1 to utilise and decipher how to incorporate certain clauses of E3 Internal Moisture, and then provide a design that meets the requirements for an "over surface finish" which is very easily achieved. This provided very little information pertaining to Waterproof Membranes and no information at all for Waterproofing Membrane Systems.
Mentions of "waterproof grout lines" are currently included in AS1. Other inaccurate terminology and misleading product expectations just add to the confusion that E3/AS1 provides. There is also a similar lack of detailed information for heating, ventilation, and condensation related properties.
One critical area of waterproofing is to ensure the detail you use to seal the penetrations for the shower mixers/taps and their associated outlets not only completely seals the penetrations from water ingress from the outside, but will also provide protection to the wall cavity. The associated tapware must have an "access hole" left in the wall lining to meet the requirements of the tapware provider, and also E3/AS2 by way of the following:
"Water control valves and shower rose fittings within a shower area wall to which a waterproof membrane system is required, must be waterproofed where they penetrate through the membrane and through any secondary lining and any over surface finish. The penetration must be detailed in a manner that allows access to enable repairs and replacement of washers or ceramic discs without damaging the wall lining or membrane. This must be done by using a proprietary flange system, which encompasses the valve or fitting body, and will trap and discharge any potential leaks through the front of the flange and down the wall lining."
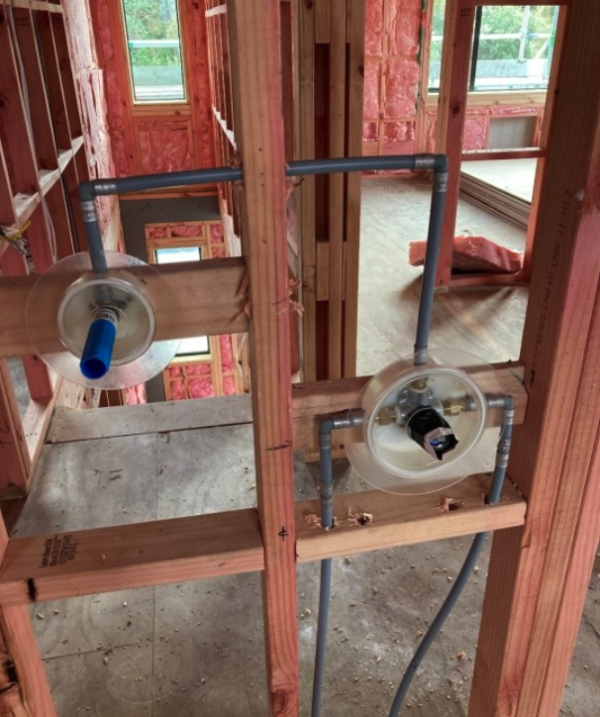
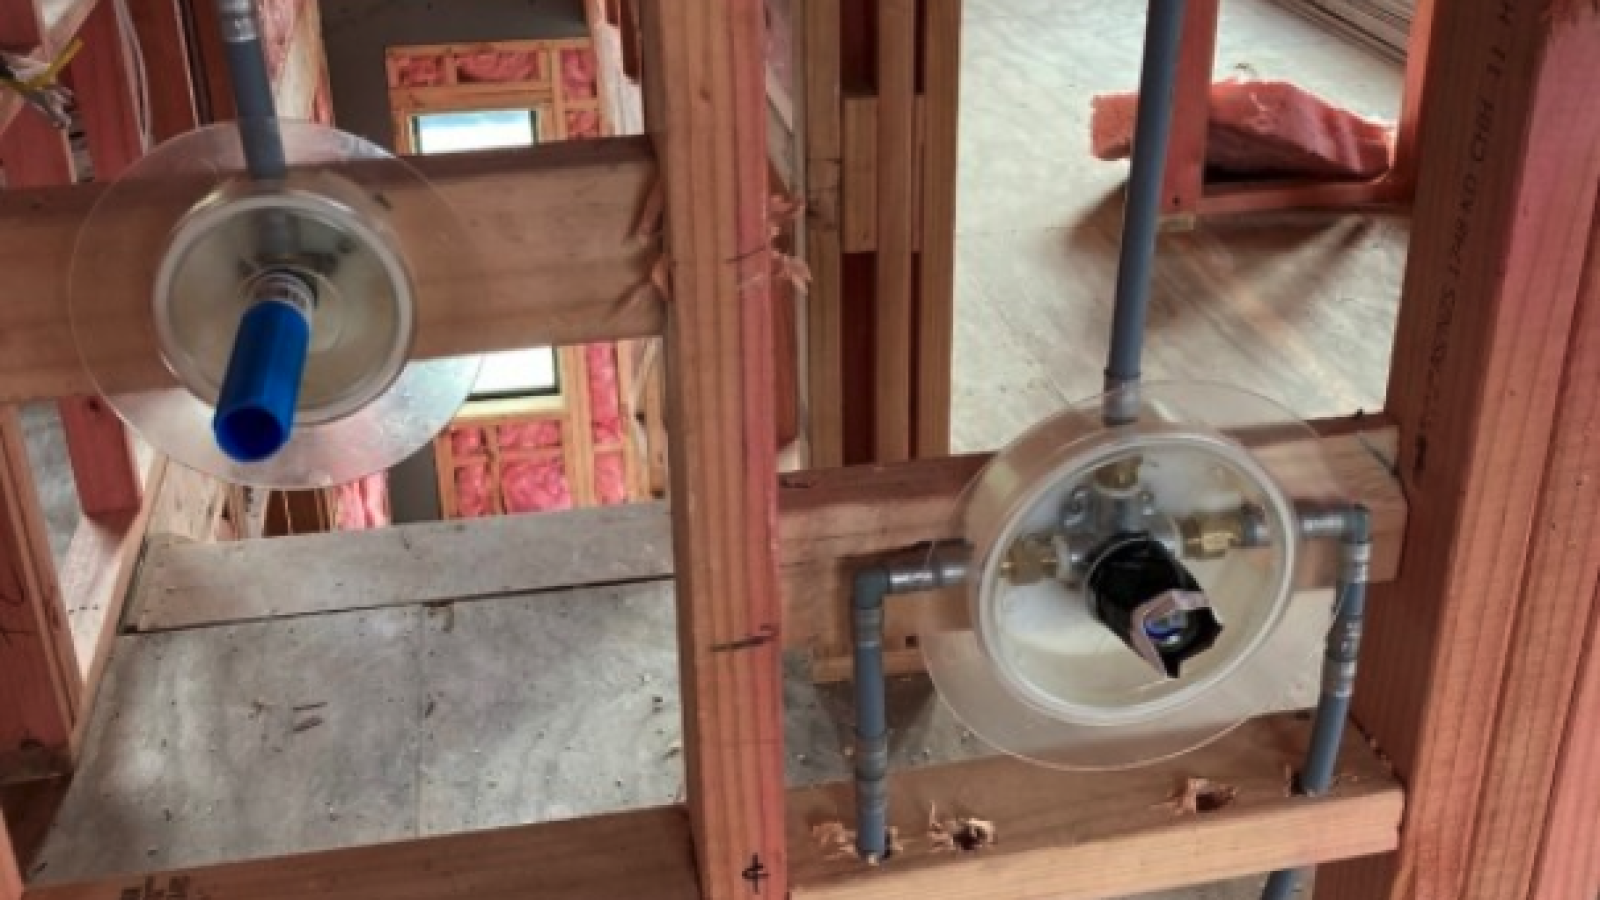
Fig.1 shows the correct way to achieve compliance to E3/AS2 prior to the pre lining inspection stage.
The above image shows a Cavity Wall Protector installed for the shower mixer and its outlet in a shower situation. This is what a compliant wet area wall frame must look like, prior to the pre line inspection stage being completed. Regardless of whether a tiled or acrylic lined shower wall finish, the requirements for the penetrations of the tapware remain the same and need to be addressed in the same manner.
This achieves the full requirements of the above clause while allowing the warranties for the tapware to be achieved. It also provides a clear finishing point for any waterproof membrane to terminate onto; a very important point which is demonstrated with the following images.
Below are common images of incorrectly sealed shower mixers and their outlets, prior to an over surface finish being installed. They all appear to be sealed onto the waterproof membrane and in some cases, onto the actual tapware, where the protective cover supplied by the tapware manufacturer has been removed.
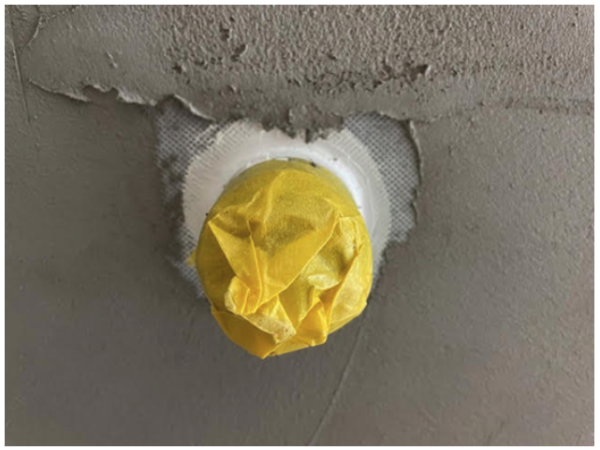
Fig.2: Sealant connected onto removable cover. This would presumably be removed after tile installation, breaking any seal in the WPM. In this example, there is no protection provided to the wall cavity.
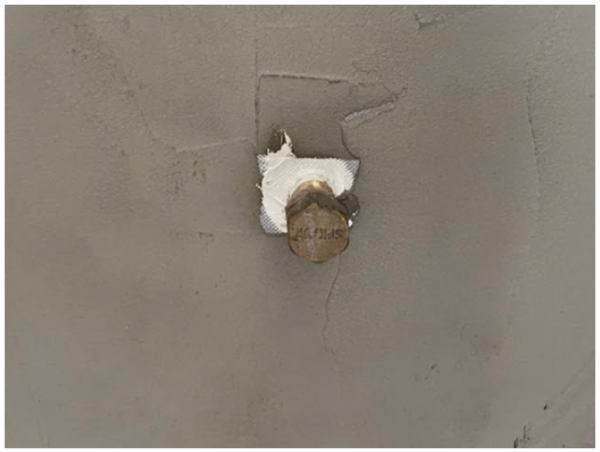
Fig.3: Associated outlet, installed with the same method.

Fig.4: Using an adhesive bandage to seal onto temporary mixer sleeve cover and wingback bung.
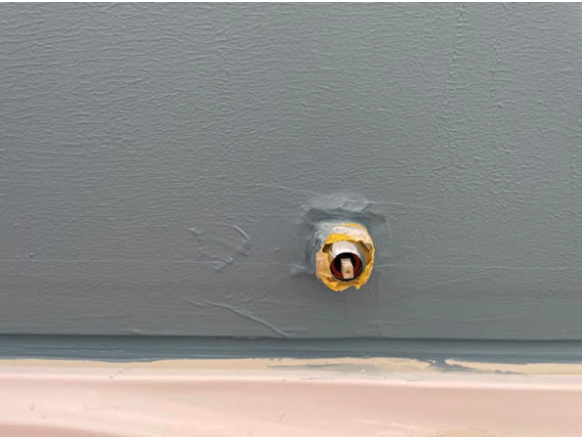
Fig.5: The oversized hole in the wall appears to have been filled with sealant and then the WPM applied over, again onto the temporary/removable shower mixer sleeve cover.

Fig.6: In this image the WPM and accessory bandage have been sealed onto the protective/removable shower mixer sleeve cover. What happens to the WPM once this is removed for all of the above examples?
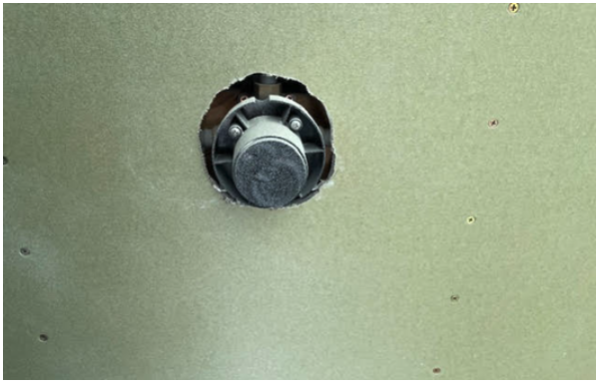
Fig.7: In this example an acrylic shower liner is to be installed. And, correctly, the protective/removable shower mixer sleeve cover has been left on. This unsealed wall cavity will have a high probability of allowing water to ingress and provides no allowance for the consequence of failure.
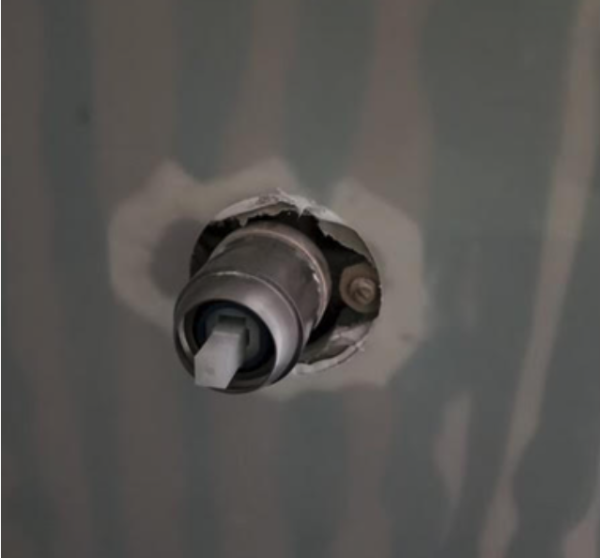
Fig.8: In this example the access hole has been correctly left in the wall lining to allow access to the pressure regulating valve. This leaves the hole in the wall exposed to moisture that can enter the unsealed wall cavity.
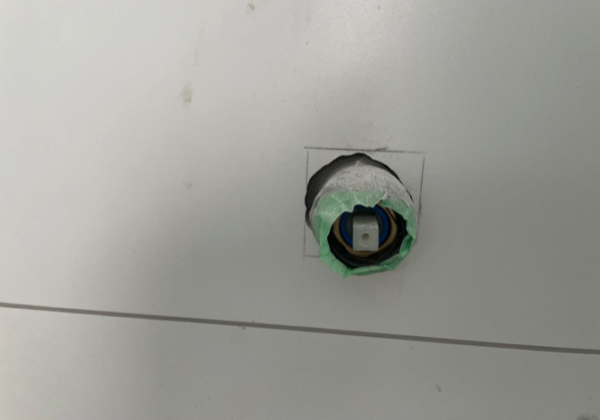
Fig.9: In this example, the unsealed penetration and wall cavity will rely on a thin bead of silicon to seal directly onto the shower mixer. Note the intended small cover face plate. Silicon cannot be solely relied upon to maintain waterproofing integrity.
E3/AS1 would consider these above examples as meeting the requirements of E3.3.4 - E3.3.6. These functional requirements of E3 Internal Moisture only address the easy-to-clean over surface finishes and their placement to sanitary fixtures requirement. It would suggest that silicon sealant may be sufficient to meet the last requirement of preventing the passage of moisture past the wall linings and into concealed spaces.
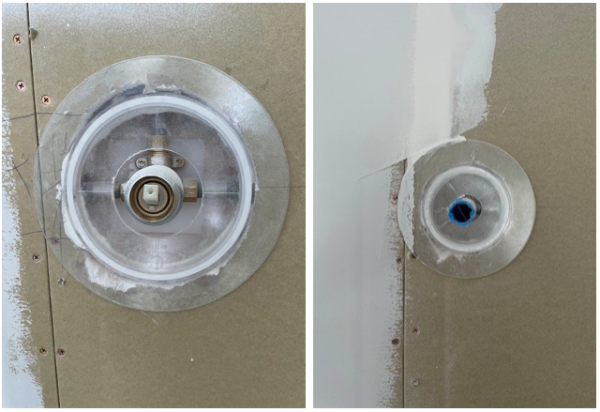
Fig.10: Shower wall penetrations properly sealed using the (Cavity Wall protectors).
The above image shows a sealed shower wall and sealed wall cavity penetrations that meet the requirements of E3/AS2 and also achieve the warranty requirements from the tapware manufacturer, prior to the installation of a WPM system. Note the access holes cut into the flange allowing for clear termination of the WPM.
Development of an acceptable solution for Waterproof Membrane Systems was driven out of the failings derived from the underdeveloped information contained inside E3/AS1.
WPM system TDS information and any endorsement of an approved/licensed/trained, applicator or installer from a manufacturer or supplier of a WPM system, has been undertaken "in house" by the supplier with typical WPM construction details coming from AS 3740; an Australian Standard that does not serve the NZ construction method for Internal Waterproofing well and is not typically suited to our first choice of build materials.
E3/AS2 has been developed for the selection, design, and installation of an Internal Wet Area Membrane System. By using it as the correct pathway from the design stage through to the installation of an over surface finish, we will remedy the errors of the past, and produce wet area environments that will perform to the expectations of a dry, mould free bathroom that is safe to use and remains beautiful for many years.
The Waterproofing Membrane Association Inc. have three Code of Practice documents available to purchase via our secure website. Please visit wmai.org.nz/publications

 Most Popular
 Popular Products